You can add more SSDs to your Rok Box.
First, you'll need a new SATA III SSD, such as the one found at the below link:
You'll also need a SATA III data cable -- there may be two included with your PC's additional cables that came with the PC.
If not, you may procure SATA data cables from here:
Once you have these materials, you can move onto installing a new drive in your Rok Box.
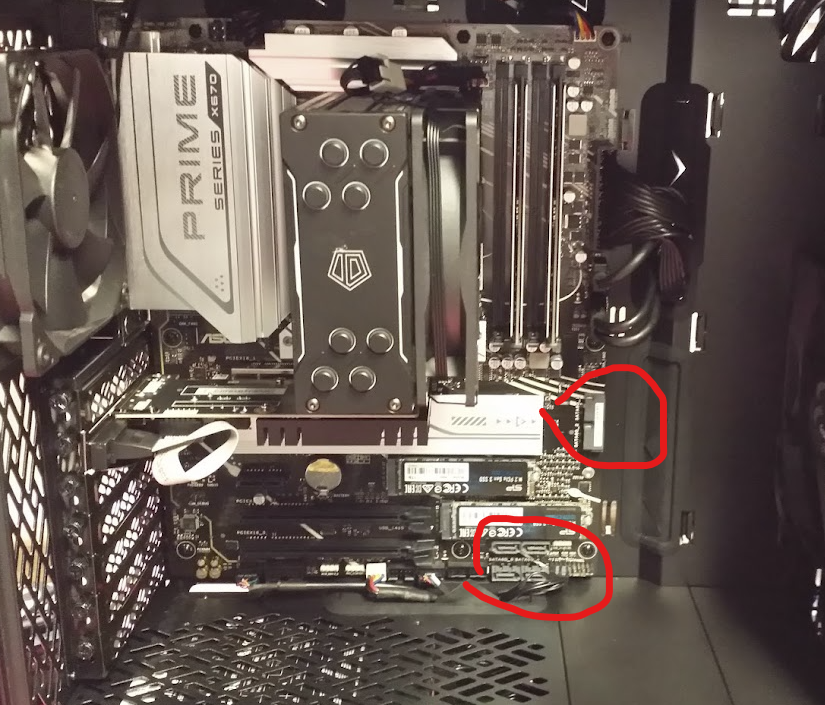
First, locate an open SATA data port on your motherboard. They are located in these locations:
You'll also need to connect the drive to a power cable connection from your PC's power supply.
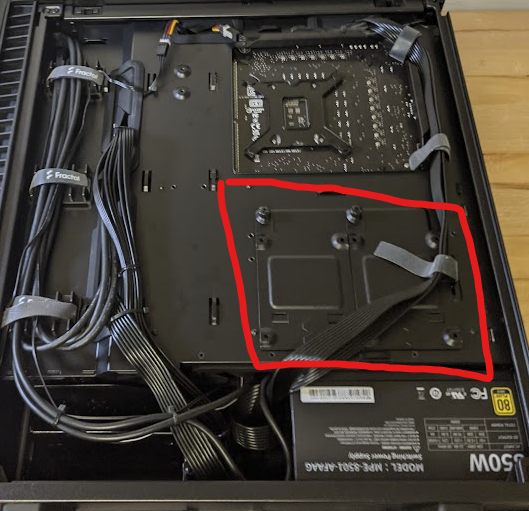
Remove the right-hand side of the PC case (if you're looking at the front of the case with a tower chassis), or the top case of a rackmount chassis, and locate the PSU at the bottom-right or top-right-hand corner of the case, as shown in the below examples:


The cables to which you'll connect your new drive will look like this:

If you don't see cables that look like this, check the cable bag that came with your PC -- there are likely cables of this kind, marked SATA, in the bag of cables included with your Rok Box.
Connect one to the back of the PSU. The PSU has modular plug connections on the back of it to which you can plug the SATA power cable:

Once that is done, mount the new drive to one of the SSD mounting plates behind the motherboard in a tower chassis, or into a drive tray in a full tower or rackmount chassis.
Replace the PC case sides or topcase, boot up your Rok Box, and then right-click the Start button, and click Disk Management.
Once Disk Management opens, you'll need to first initialize your new drive.
The disk management console will ask you to confirm that you wish to initialize your new drive -- click OK if a message pops up asking you to do so. If not, right-click the drive from the list of drives in your PC -- it will show as unallocated, as the drive has not yet been partitioned.

Next, right-click the new drive, click "format", and choose "new simple partition", and then walk through the wizard to format and name the drive. You may name your drive any name you wish.


You should now be able to use your new drive.
If you have issues or questions with this process, please feel free to reach out to PCAudioLabs support.
Was this article helpful?
That’s Great!
Thank you for your feedback
Sorry! We couldn't be helpful
Thank you for your feedback
Feedback sent
We appreciate your effort and will try to fix the article